Excert from the Track Chart for Tobyhanna
With the exception of some of the high-priority TOFC trains, most traffic eastbound out of Scranton needed some help to get up the grade out of Scranton. Some of the lighter trains only needed help to Moscow, but most of the time the helpers remained with the train to Tobyhanna. There, two crossovers helped the crews move the caboose to the rear of the train and cross the helpers over to the westward track to return to Scranton. Pennsylvania law and EL Timetable rules required helpers of more than 3,000 horsepower to be in front of all cabooses except the 850-910 series (the "Keyser Valley" caboose). So nearly every helper set would have to be cut out of the train and the caboose recoupled before the train could depart.
Fortunately, the layout at the Tobyhanna Army Depot switch allowed these moves:
Excert from the Track Chart for Tobyhanna
A train approaching from the west
on Track 2 can stop with the caboose and helpers just west of the crossovers,
cut the helpers off, pull east of the corssovers, and wait while the helpers
drop the caboose between the crossovers, run around it, and place it on the
rear of the train. The helpers would then cross over to track 1 and return to
Scranton. There was a dispatcher's phone located at the crossovers to allow
the helper crew to obtain clearance for the runaround move and then to return
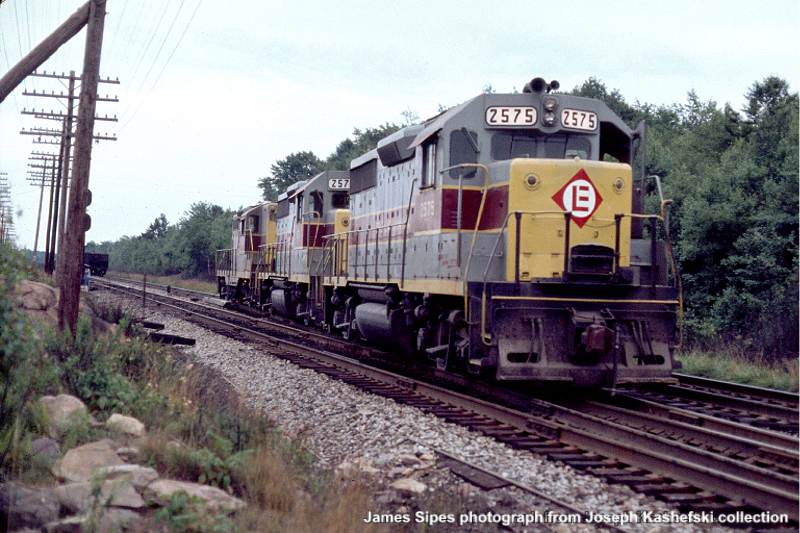
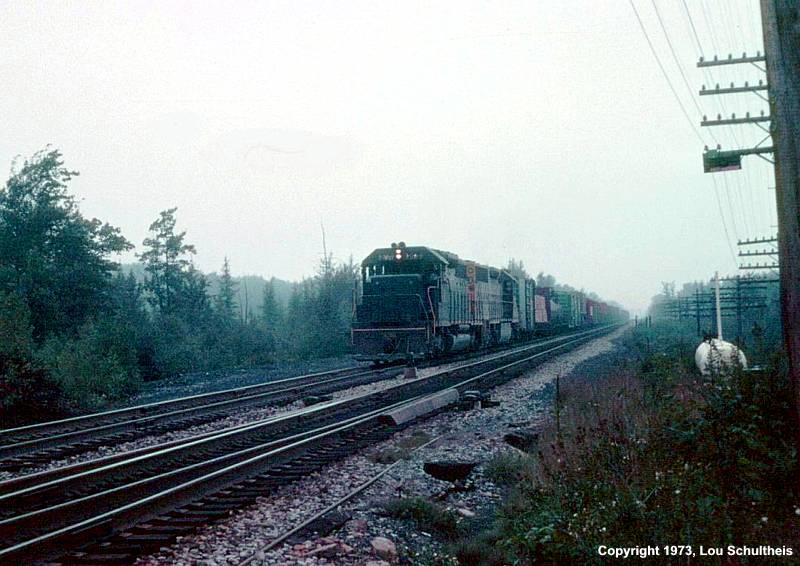
to Scranton. In the photo below, from Joseph Kasheski's collection of James
Swipes' photos, the helpers have cut off from the eastbound train (the hoppers
visible in the background) and are crossing over to the westward track. The
caboose is probably to the right on the eastward main between the crossovers.
Note the crewmember on the lineside telephone in the background, visible just
to the left of the train, and the switch to the Army Depot just barely visible
next to the crewman:
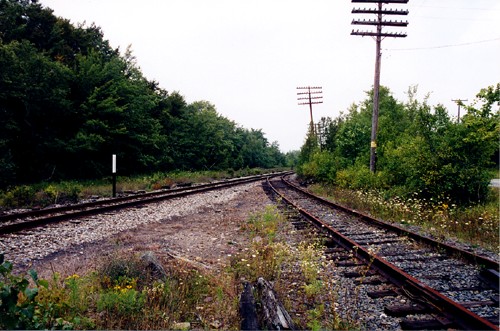
In 1999, the only trace of the helper operations was the telephone box. Visible in the photo below are a signal relay box and the propane tank for the switch heater. The crossover switches could be controlled either remotely from the Tobyhanna tower or locally at the switch stand itself. This photo is looking to the north from the mainline:
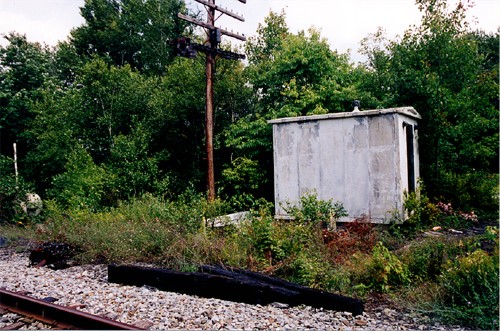
The mainline was single track in 1999 so there were no longer any crossovers,
and the entrance to the Army Depot storage yard was simply a switch off the
main line. Looking west toward the remaining mainline track from just up the
Depot spur: